A Quick Word

If you're here, you're looking to see how to begin understanding the camera trapping space. This introductory piece is meant for a variety of possible users - wildlife researchers, students, communities, and so on. This is not where you will find detailed resources on specific topics. Nor will you find definitive “this is the way it must be done” style answers. The answer to the “best” way to use a camera trap always has been and will for the foreseeable future remain the same - it depends.
The goal of this blog post is to help you navigate the nuances of those two words - to be able to begin gathering the context and background information needed to make a well informed decision. Furthermore, this blog post and the resources provided will help set the stage for camera trapping professionals to more efficiently interact with other trappers, and to more efficiently seek guidance from experienced researchers and biologists.
You do not need any background on what a camera trap is to be able to understand this post! This post offers a plain language introduction/summary to camera trapping, based on three introductory academic papers:
- "How camera traps work and how to work them" by Peter J. Apps and John Weldon McNutt (2018)
- "A gentle introduction to camera trap data analysis" by Rachel Sollmann (2018)
- "Recommended guiding principles for reporting on camera trap research" by Paul Meek and other authors (2014)
This post limits the use of complex jargon, and more details can be found in the papers, and in WildCAM's various resources.
What is a camera trap and how does it work?
The first half of this section's heading will be quick to answer. A camera trap is a camera that is attached to a support (like a tree) that captures images and/or videos when triggered by motion in front of it (typically from animals moving in front).
A camera trap has a simple job: to wait in the field until an animal passes by, then take a picture or video of it, and save the data.” (Apps & McNutt, 2018)
How does it work?
That is what most of this section will be about. This will be an overview of the major functionalities and associated jargon of camera traps. For more detailed information, WildCAM's directory of publications and in-house developed resources are good places to go.
How does it get triggered?: most cameras use a passive infrared (PIR) motion detector. The idea is that the PIR detector measures a difference in temperature, which triggers an image to be taken. This happens, for instance, when a warm bodied animal like a deer walks in front of the camera. The contrast between the warm deer and the cold ground triggers an image to be taken!

Is the photo instant?: not really. The gap between the subject entering the detection zone and the image being taken is known as the trigger delay.
- Why does my camera keep missing animals or only capturing the rump/tail? - if a camera has a high trigger delay (i.e it takes the camera more time to respond to a trigger), a faster animal may partially or completely exit the frame by the time the picture is actually taken.
- Why is my camera taking so long between taking images? - Following an image capture (outside of burst mode), cameras usually require a “recovery” period. This adds an additional bit of time (a few seconds at most) before the next picture is taken.
Time between consecutive captures = Recovery Time + Trigger Delay
What about low-light images?: there's two major kinds of “flashes” used. Visible light flashes operate similarly to usual camera flashes. They are visible to the naked eye, and can ultimately influence the behavior of most animals in the area (like by causing animals to avoid the area). Alternatively, infrared flashes are less intrusive, though the images are monochromatic and in lower resolution. If accurate identification via markings or colour at night time is of importance then the latter may not be ideal.
How do I put my camera up?
We have a field guide! Check out WildCAM's field protocol and updated deployment (for new cameras) and check (when revisiting existing cameras) sheets! Additional field material can also be found below by our colleagues at the Alberta Biodiversity Monitoring Institute (ABMI).
- WildCAM Field Protocol/Camera Setup Up Guide
- WildCAM Field Sheets
- ABMI Field Protocol (includes both remote cameras and autonomous recording units (ARUs))
For more structured projects, a sampling design (a plan on how cameras will be distributed across the landscape) will be needed. WildCAM's Directory of Publications has a number of academic resources to help inform users of various sampling designs. Alternatively, if the priority is simply securing a high number of detections of wildlife, keep the camera pointed towards high traffic creatures like wildlife trails, and adjust the height to roughly match the shoulder height of your main species. Avoid facing the south in open areas to prevent glare from sunlight, and take test photos before confirming camera placements!

I have SD Cards. What now?
Working with camera trap images is a world all its own. The work done to process images and then to analyse that data alone can be explored for pages. This section will briefly introduce the two stages mentioned - processing and analysis (the latter of which will be updated soon).
What to include: Introduction to metadata standards
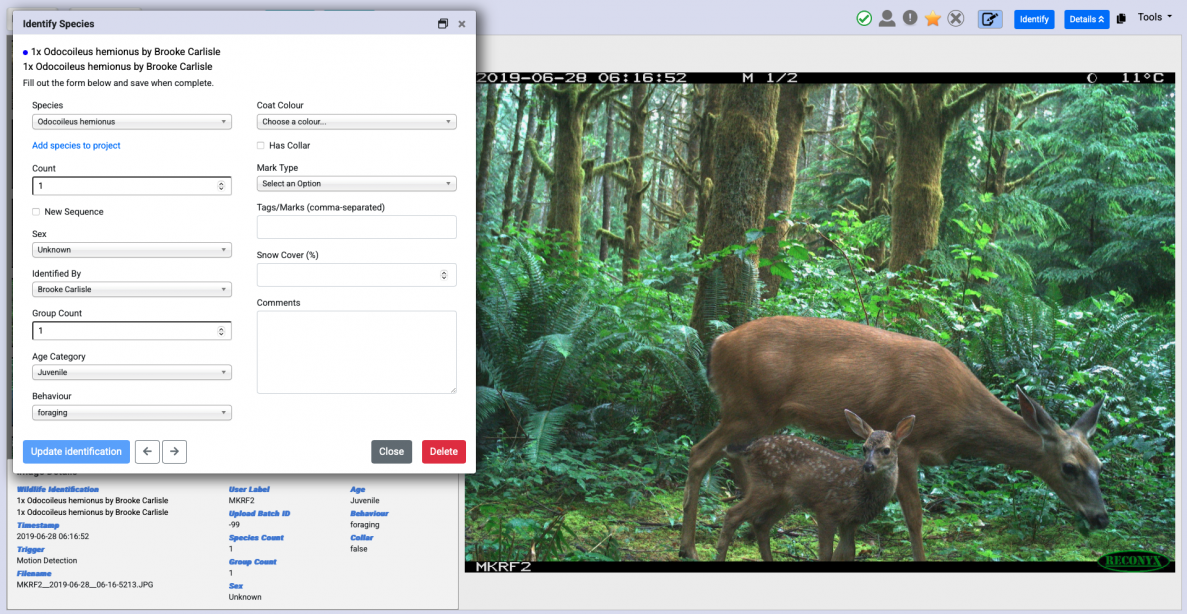
Images from SD cards will first need to be processed for any associated analysis to be conducted. This means that the qualities of the image will need to be documented. What animal(s) was seen? How many individuals are there? Can you distinguish them by markings or other identifying features? Can you sex the individual? Can you tell a young individual (like a calf) apart from an adult?
These details are often referred to as the image's metadata. As you can imagine, standardising these standards can allow for significant amounts of collaboration across datasets. A commonly used metadata standard (as they are known as) are the Wildlife Insights Minimum Metadata standards. These standards include a number of basic information points that should ideally be recorded (both for uploading project data to Wildlife Insights and for general data management practices). An excerpt from the minimum image metadata standards is shown below.
| Field Name | Description | Example |
|---|---|---|
| Project ID | An internal identification for the project. It should be a relatively short name that makes the project unique among other projects for the user or organization | IDE |
| Deployment ID | Unique identifier for the camera deployment (within the project) | IDE42 |
| Image ID | Unique identifier for the image (within the project). For example: IMG_001 may be unique in one folder of your dataset. But, it can get repeated in other folders. It's better to use long image ids like: [deployment_name][location_name][image_name]. |
dep_1_loc_1_IMG_001 |
| File Location | Location of the image on the Google Cloud Platform or publically accessible HTTP endpoint. The directory structure of your images does not matter but does need to be captured accurately. Note: Do not include spaces or special characters (except hyphens and underscores) in your location string. | D:/Images/.... (for images stored locally) |
| Identified By | First and last name of the person who identified the photo type | John Doe |
| Genus | Latin name for Genus | Canis |
| Species Name | Latin name for species | lupus |
| Common Name | Common name for a species in the image. Any identifications that are not wildlife (ex. cars, bicycles, etc) and types of humans (park staff, hunters,etc) should be listed here. | Gray wolf |
| Date/Time Captured | Date and time an image was taken. Include a timezone otherwise assumed to be local time. | 2016-04-18 06:45:31 |
| Number of Objects/Count | Number of objects OR animals per species in the image. Note: if an image has multiple species, each species will require a separate record. For example, an image has 2 deer and 1 racoon. There should be one record with deer in the taxonomy fields and number of objects =2 and another record with raccoon in the taxonomy fields and number of objects=1. Please leave this field empty if there are no animals or identified objects in this image. | 2 |
| Age | Age of animal (can be numeric or by life stage) | Adult |
| Sex | Sex of animal (can be "Unknown" as well) | Female |
| Animal recognizable | Was the animal individually recognizable? This means you can give it a unique identifier | Yes |
| Individual ID | Individual animal ID used to identify an individual animal if possible (ex. through markings, coat patterns, etc). | jaguar-0658 |
| Additional Notes | Notes about the animal and/or the image itself | |
| Markings | Distinct markings or dominant color of the animal |
Where to process: Image Tagging Platforms
A common question is where should one process these photos. WildCAM has an existing platform comparison guide, and we are working to update it soon. Commonly used platforms include Wildtrax, Camelot, and Timelapse. WildCAM members at the Wildlife Coexistence Lab use a platform known as Migrations.
Some questions to consider when selecting a wildlife image processing platform are:
- Do you have access to a cellular/internet connection?
- Are there restrictions on where images can be stored or who they can be shared with?
- How customizable does the platform need to be?
Feel free to email us at info@wildcams.ca for any specific queries on platform selection!
Futher Resources
We have a number of resources available here at WildCAM. There are some here, with more deailed resources available in our reseource library in the top menu bar
- Camera Trapping for Conservation by Wildlabs: This is a free introductory course introducing the world of cameratrapping to new practitioners. No prior experience is needed to enrol. Questions discussed in the course incldue:
- When and where camera trapping is an appropriate method.
- How to design surveys to meet specific research objectives.
- The technical aspects of camera trap selection and deployment.
- Best practices for managing and analyzing the vast amount of data generated.
- A Guide for Best Practices in Camera Trapping for Conservation by the World Wildlife Fund (WWF): This guide provides a comprehensive overview of camera trapping, including its history, recommendations on deployment, and an introduction to analysis of camera trap data
- A Guide to Using Wildlife Cameras for Ecological Monitoring in a Community-based Context by the University of Guelph